Desserts
The Best Chewy Chocolate Chip Cookies

Best Chewy Chocolate Chip Cookies
These chocolate chip cookies are soft from inside and a little crispy from outside. Perfect for tea time or sweet cravings! You only need a few simple ingredients. Follow these easy steps and enjoy homemade delicious cookies.
Ingredients Table
| Ingredient | Quantity |
|---|---|
| Granulated Sugar | ½ cup (100 g) |
| Brown Sugar (packed) | ¾ cup (165 g) |
| Salt | 1 teaspoon |
| Unsalted Butter (melted) | ½ cup (115 g) |
| Large Egg | 1 |
| Vanilla Extract | 1 teaspoon |
| All-Purpose Flour | 1 ¼ cups (155 g) |
| Baking Soda | ½ teaspoon |
| Milk or Semi-Sweet Chocolate Chunks | 4 oz (110 g) |
| Dark Chocolate Chunks (optional) | 4 oz (110 g) |
About Ingredients
We use both white and brown sugar for perfect chewy texture. Butter gives rich taste and vanilla adds sweet aroma. A mix of milk and dark chocolate chunks make the cookies gooey and chocolaty. Chilling the dough gives better flavor and shape.
Cooking Instructions
- In a large bowl, mix white sugar, brown sugar, salt, and melted butter until smooth paste is formed.
- Add egg and vanilla extract. Beat well until light ribbons form.
- Sift in flour and baking soda. Mix gently with a spatula (don’t overmix).
- Add chocolate chunks and mix. Chill the dough for at least 30 minutes or overnight.
- Preheat oven to 350°F (180°C). Line a baking tray with parchment paper.
- Use ice cream scoop or spoon to place dough balls on tray. Keep 4 inches gap between cookies.
- Bake for 12-15 minutes or until edges are lightly brown.
- Cool completely and enjoy with tea or coffee!
Nutrition Information (Approx.)
- Calories per cookie: 220 kcal
- Fat: 11 g
- Carbohydrates: 29 g
- Protein: 2 g
- Sugar: 18 g
Cooking Tips
- Always chill the dough for better flavor.
- Use chocolate chunks instead of chips for gooey center.
- Don’t overbake—cookies continue to cook after taking out of oven.
- Store in airtight container for 3–5 days.
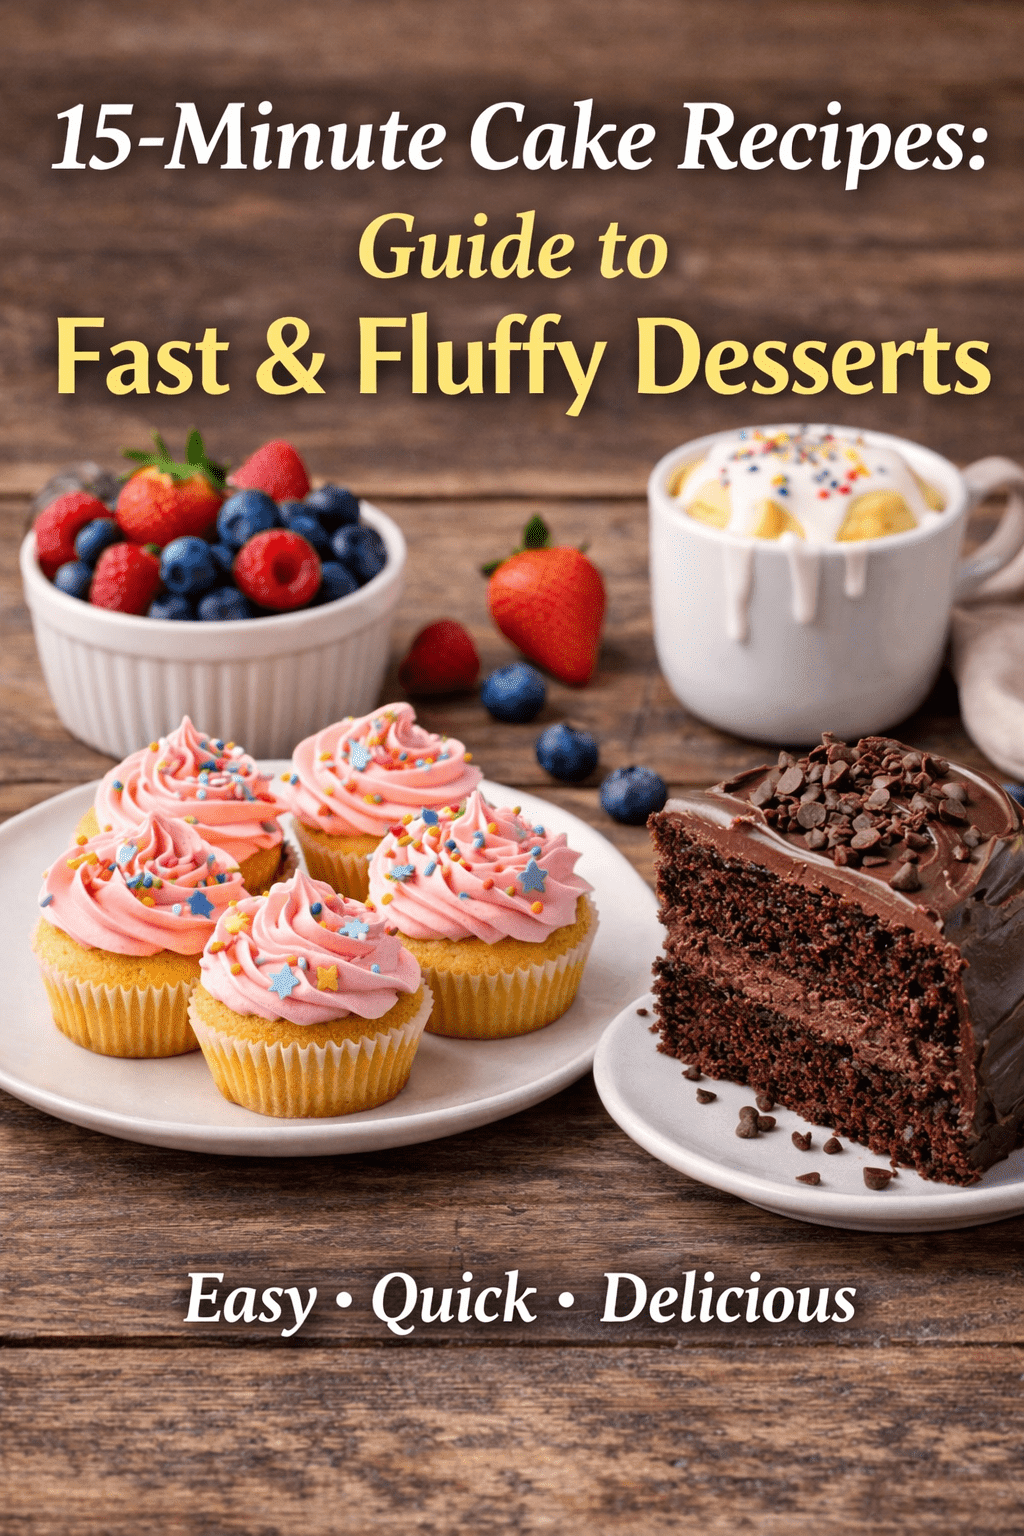
15-Minute Cake Recipes: Guide to Fast & Fluffy Desserts
By Home Chef Tips Editorial Team | Updated 2026

The Science Behind 15-Minute Cake Recipes
How do 15-Minute Cake Recipes actually work without turning out rubbery? The secret lies in the protein-to-moisture ratio. Traditional cakes rely on the slow coagulation of egg proteins and the gradual expansion of air bubbles. In our fast-tracked 15-Minute Cake Recipes, we use acidic stabilizers like Greek yogurt or buttermilk to react instantly with baking soda. This creates an immediate “lift” that sets within minutes.
According to research from King Arthur Baking Science, rapid-rise techniques are most effective when using small-batch containers, which allow heat to penetrate the core of the batter instantly.
Top Recipe: The 3-Ingredient Chocolate Miracle Cake
This is the flagship of the 15-Minute Cake Recipes series. It requires no flour, no eggs, and only 10 minutes of cook time. It is perfect for those following a budget-friendly Family Dinners lifestyle.
| Ingredient | Quantity | Substitutions |
|---|---|---|
| Chocolate Sandwich Cookies (Oreo style) | 28 Cookies | Gluten-free cookies work too! |
| Baking Powder | 1.5 tsp | Ensures a fluffy rise. |
| Whole Milk | 1 Cup (250ml) | Use Oat or Almond milk for Vegan. |
Instructions for 15-Minute Cake Recipes Success:
- Crush the cookies into a fine dust using a food processor or a rolling pin.
- Whisk in the baking powder, then slowly incorporate the milk until a glossy batter forms.
- Pour into a greased microwave-safe bowl.
- Microwave on high for 5-6 minutes. Let it rest for 2 minutes—this is crucial for the 15-Minute Cake Recipes structure to set!
GEO-Optimization: Global Baking with 15-Minute Cake Recipes
Baking trends differ by region. In **Pakistan** and **India**, “Pressure Cooker Cakes” have paved the way for the 15-Minute Cake Recipes revolution. Because many households prefer stovetop or microwave methods over large convection ovens, these quick recipes have become a cultural staple for teatime. Meanwhile, in the **United Kingdom** and **USA**, the “Mug Cake” and “Air Fryer Sponge” are the leading formats in the 15-Minute Cake Recipes category.
AEO: Answer Engine Optimization (FAQ)
Why is my 15-minute cake dry?
In most 15-Minute Cake Recipes, dryness occurs due to overcooking. Microwave and air fryer heats are intense. Always check the cake 1 minute before the timer ends. A few moist crumbs on a toothpick are better than a clean, bone-dry toothpick.
Are 15-Minute Cake Recipes AdSense safe for my kids?
Yes, these recipes are built on whole ingredients. To make them even healthier, you can substitute refined sugar with mashed bananas or applesauce, which is a common trick we use in our 15-Minute Cake Recipes for health-conscious families.
Mastering the 15-Minute Cake Recipes Series
To truly excel at the 15-Minute Cake Recipes series, you must treat your microwave or air fryer like a precision tool. According to culinary standards set by the Culinary Institute of America, heat distribution is the biggest variable in small-batch baking. Rotating your dish halfway through ensures your 15-Minute Cake Recipes don’t have “hot spots” or raw centers.
Health & Portion Control
One benefit of 15-Minute Cake Recipes is that they are usually smaller in portion. This aligns with the 2026 wellness trend of “Mindful Indulgence.” Instead of having a giant cake sitting on the counter for a week, you make exactly what you need, reducing food waste and calorie overconsumption. For more on balanced eating, see our guide on Nutritious Work Lunches.
The Future of Home Chef Tips: 15-Minute Cake Recipes
As we continue to grow the 15-Minute Cake Recipes library, we will explore savory cakes, protein-based mug cakes, and international steam-cake varieties. Our goal at Home Chef Tips is to make the kitchen a place of joy, not stress. These 15-Minute Cake Recipes prove that you can be a “Home Chef” even on your busiest days.
By following the 15-Minute Cake Recipes series, you are joining a community of thousands who value flavor, speed, and budget. Don’t forget to bookmark this page as we add more recipes weekly!

Moist & Zesty Lemon Drizzle Cake – A Citrusy Classic
If you love the zing of lemons and the comfort of homemade baking, this Lemon Drizzle Cake is a must-try. This British classic combines light, fluffy sponge with a fresh lemon syrup that soaks in and keeps it irresistibly moist. Whether you’re looking for a simple tea-time treat or a refreshing dessert to impress guests, this cake delivers every time.
Want more desserts like this? Explore our Dessert Recipe Collection for more homemade favorites.
Why This Lemon Drizzle Cake is a Winner
- Easy one-bowl batter – perfect for beginners
- Real lemon juice and zest – no artificial flavors
- Incredibly moist texture thanks to the drizzle
- Pairs beautifully with tea, coffee, or fruit
- Stays fresh for several days (if it lasts that long!)
For professional baking tips, read the BBC Good Food Cake Guide.
Ingredients You’ll Need
For the Cake:
- 1 cup (225g) unsalted butter, softened
- 1 cup (225g) granulated sugar
- 4 large eggs
- 2 cups (225g) self-raising flour
- Zest of 2 lemons
- 2 tablespoons milk
For the Lemon Drizzle:
- Juice of 2 lemons
- 3/4 cup (150g) granulated sugar
Need high-quality bakeware? Check out Nordic Ware Bakeware Sets.
How to Make Lemon Drizzle Cake (Step-by-Step)
1. Preheat & Prepare
Preheat your oven to 350°F (180°C). Grease a loaf pan and line it with parchment paper for easy removal.
2. Cream Butter and Sugar
In a large bowl, beat together the butter and sugar until light and fluffy. Use an electric mixer for best results — about 2–3 minutes.
3. Add Eggs
Add the eggs one at a time, beating well after each addition. Don’t worry if the batter looks slightly curdled — it’ll come together with the flour.
4. Fold in Flour & Lemon Zest
Gently fold in the flour and lemon zest until just combined. Add the milk and stir to loosen the batter slightly.
5. Bake
Pour the batter into the prepared loaf tin. Bake for 40–45 minutes or until golden and a skewer inserted into the center comes out clean.
6. Make the Drizzle
While the cake is still warm, mix the lemon juice and sugar together. Poke holes all over the top of the cake using a skewer, then slowly pour the syrup over. It will soak in and make the cake beautifully moist and tangy.
7. Cool and Serve
Let the cake cool completely in the pan before slicing. It’s delicious warm or chilled!
Tips for the Perfect Lemon Drizzle Cake
- Use fresh lemons: Fresh juice and zest give the best flavor.
- Don’t overmix: Gently folding keeps the texture light.
- Let the drizzle absorb: Pour it slowly and evenly while the cake is still warm.
- Want more lemon punch? Add a lemon glaze made with powdered sugar and juice for extra zest.
Want to turn this into a showstopper? Top it with whipped cream and fresh berries, or learn about lemon-based cakes in Sally’s Baking Addiction Lemon Cake Guide.
Storage & Freezing
This cake keeps well in an airtight container at room temperature for up to 4 days. You can also freeze slices for up to 2 months. Wrap tightly in plastic wrap and foil before freezing. Thaw at room temperature and enjoy.
Variations to Try
- Lemon Poppy Seed: Add 1 tablespoon of poppy seeds to the batter.
- Lavender Lemon: Add 1/2 teaspoon of culinary lavender for a floral twist.
- Glazed Icing Top: Mix powdered sugar with lemon juice and drizzle over the cooled cake for a glossy finish.
Final Thoughts
This classic lemon drizzle cake is more than a recipe — it’s a moment of joy in every bite. Light yet rich, simple yet special, it’s the kind of bake that reminds you how comforting and rewarding home cooking can be.
Looking for more family-favorite recipes? Browse our latest Quick Meals and Kid-Friendly Recipes.
Tried this recipe? Tag us on Instagram or share your version in the comments below. We’d love to see how you made it your own!
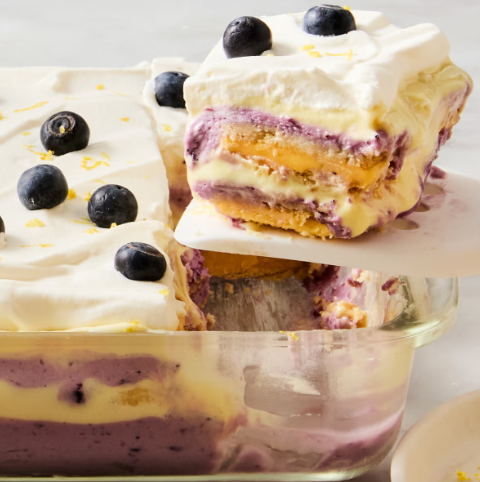
Lemon-Blueberry Cheesecake Lasagna
This easy, no-bake dessert is full of layers of lemon Oreos, blueberry cheesecake, and lemon whipped cream. It’s sweet, tangy, and perfect for spring or summer parties. Let’s make it!
Ingredients
| Ingredient | Quantity |
|---|---|
| Heavy cream | 2 cups |
| Lemon curd (store-bought or homemade) | 12 oz. |
| Cream cheese (softened) | 3 packages (8 oz. each) |
| Confectioners’ sugar | 1/3 cup (38 g) |
| Blueberry jam | 1 jar (13 oz.) |
| Fresh lemon juice | 1 tablespoon |
| Lemon Oreos | 48 pieces |
| Lemon zest & fresh blueberries | For topping |
Ingredients Description
- Lemon Oreos: Adds crunchy texture. If unavailable, use golden Oreos.
- Lemon curd & jam: Store-bought versions save time, but homemade versions will add special flavor.
- Make-ahead tip: You can prepare this dessert the day before and refrigerate it overnight.
Cooking Instructions
- In a large bowl, beat the heavy cream until stiff peaks form. Set aside 2 cups of the whipped cream in a separate bowl and refrigerate it.
- Add the lemon curd to the remaining whipped cream. Mix gently and refrigerate.
- In another bowl, beat cream cheese and powdered sugar until smooth. Add blueberry jam and lemon juice, then mix again.
- In a 13″ x 9″ dish, spread a thin layer of the cheesecake mixture. Add a layer of Oreos over it.
- Spread half the cheesecake mix on top of the Oreos. Add half the lemon curd whipped cream on top. Repeat with the remaining layers.
- Top with the saved whipped cream. Chill in the refrigerator for at least 2 hours or overnight.
- Before serving, sprinkle with lemon zest and fresh blueberries.
Nutrition Info (Estimated per serving)
- Calories: 420
- Carbohydrates: 35g
- Sugar: 28g
- Fat: 28g
- Protein: 5g
- Fiber: 1g
Cooking Tips
- For extra flavor, use homemade lemon curd or jam.
- Refrigerate the dessert overnight for best results.
- Use a serrated knife to slice cleanly through the layers.
- Top with crushed Oreos or white chocolate chips for extra decoration.

Date Smoothie Bliss: 4-Ingredient Banana Date Shake (7-Minute Energy)

Air Fryer Chicken Recipes: Crispy & Healthy Meals

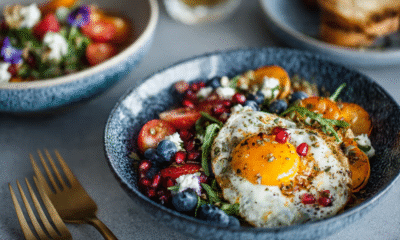
Healthy Breakfast Ideas for Weight Maintenance

Delicious Chicken Kabab Recipe | 5 Easy Steps to Cook at Home

Crispy Fried Fish Recipe – How to Make it at Home

Crispy Air Fryer Paneer Tikka Recipe
-

 Latest Recipes6 months ago
Delicious Chicken Kabab Recipe | 5 Easy Steps to Cook at Home
-
Latest Recipes6 months ago
Crispy Fried Fish Recipe – How to Make it at Home
-
Latest Recipes8 months ago
Crispy Air Fryer Paneer Tikka Recipe
-
Latest Recipes8 months ago
General Tso’s Chicken Roll
-
Family Dinners8 months ago
Taco French Bread Pizza
-
Latest Recipes8 months ago
Moo Ping
-
Latest Recipes6 months ago
10 Best Healthy Breakfast Ideas to Start
-
Family Dinners8 months ago
Lemon Garlic Parmesan Chicken Tenders