Family Dinners
Creamy Italian Sausage Pasta
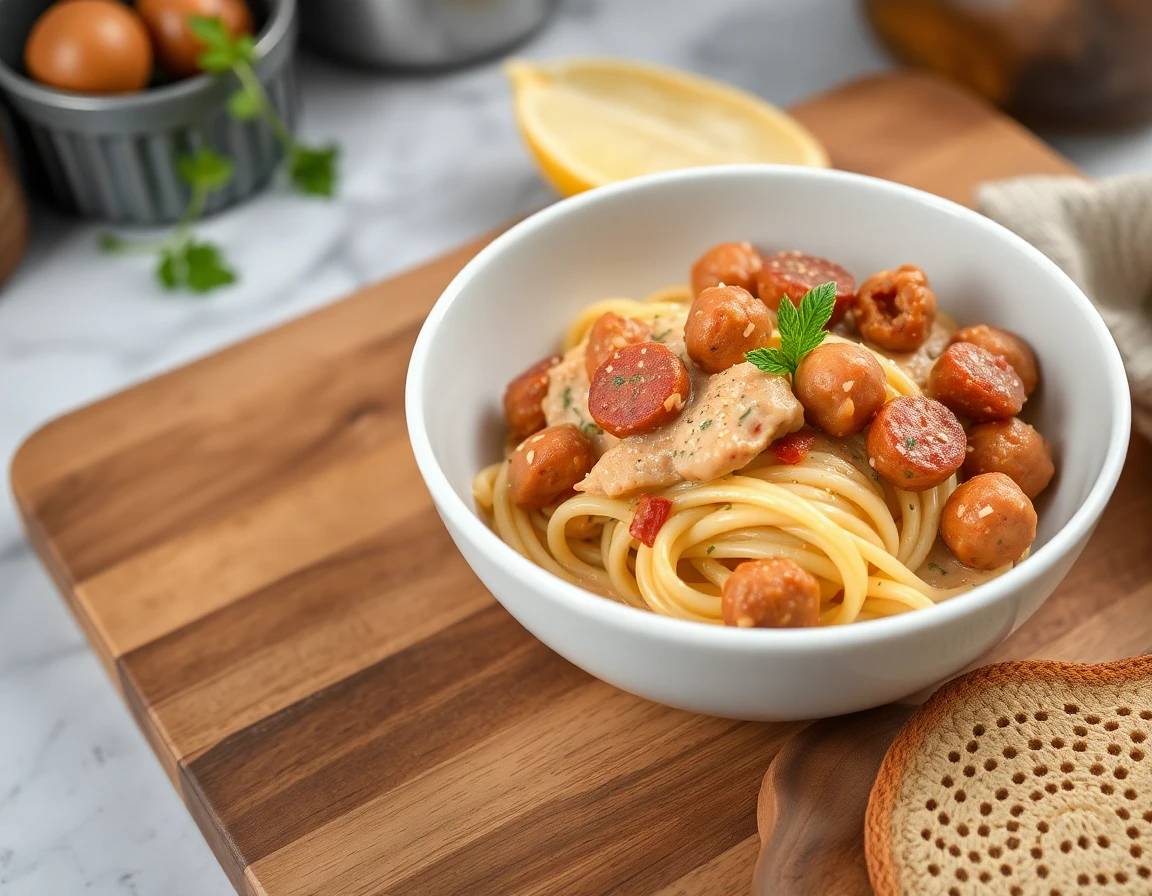
Creamy Italian Sausage Pasta
The Perfect Marriage of Bold Spices and Silky Richness
Why This Combo Works (And Why It Slaps)
Alright, my pasta-loving friends, let’s talk about why this ultimate creamy Italian sausage pasta recipe is an absolute game-changer. Cooking is often about finding the perfect equilibrium between opposing forces, and this dish is a masterclass in balance. First off, we’ve got the rich, savory Italian sausage that’s just bursting with flavor. Whether you choose a spicy variety loaded with red pepper flakes or a sweet version with hints of fennel and anise, the sausage acts as the “soul” of the dish. It’s bold, hearty, and brings a complex meatiness that ground beef simply can’t match.
Then, we’ve got the creamy sauce, which is basically a warm hug in a bowl. When you combine heavy cream with high-quality Parmesan cheese and aromatic garlic, you create a chemical emulsion that results in a velvety, luxurious texture. This sauce isn’t just a liquid; it’s a coating that clings to every noodle like it’s rolling in a high-end spa. The fat from the cream helps to mellow out the aggressive spices of the sausage, while the saltiness of the cheese enhances the natural sugars in the onion and garlic. Together, they create a dish that’s not just satisfying but also pretty much an instant mood booster. Chef’s kiss, right?
Culturally, Italian-American “Creamy” pastas have a unique history. While traditional Italian cooking often avoids heavy cream in favor of pasta water and fat emulsions, the modern cream-based sauce has become a global favorite for its comfort factor. For those interested in the authentic origins of these ingredients, you can explore the Culinary History of Italian Sausage to see how fennel-flavored meats became a staple of the Mediterranean diet.

Master Your Weeknight Kitchen
We know that as much as you love a gourmet meal, you don’t always have hours to spend in the kitchen. That is why we have curated a collection of Quick Meals that prioritize flavor without the long prep times.
If you are looking for ways to plan your entire month and keep your family excited for every dinner, be sure to check out our Weeknight Dinners category. These recipes are tested for efficiency and “picky eater” approval!
The 30-Minute Masterpiece Recipe
This recipe is designed for maximum flavor with minimum cleanup. It’s the perfect one-pan-adjacent meal for busy families.
Ingredients You’ll Need
- Pasta: 12 oz. For creamy sauces, shapes with ridges (like Rigatoni) or holes (like Penne) are best because they “trap” the sauce inside.
- Italian Sausage: 1 lb. Removing the casings allows the meat to crumble and brown evenly, creating more surface area for flavor.
- Heavy Cream: 1 cup. The high fat content (36%+) is necessary to prevent curdling when mixed with cheese.
- Parmesan Cheese: 1 cup, freshly grated. Pre-grated cheese often contains cellulose which prevents a smooth melt.
- Garlic: 4 cloves, minced. This is your primary aromatic.
- Onion: 1 medium, diced. Yellow onions provide the best sweetness when sautéed.
- Spinach: 2 cups, fresh. Spinach is about 90% water, so it will wilt down significantly.
- Olive Oil: 2 tbsp. Essential for the initial sauté.
- Salt & Pepper: To taste. Essential for the initial sauté.


Quick Step-by-Step Method
- Cook the Pasta: Boil a large pot of salted water. Add pasta and cook until “Al Dente.” Pro Tip: Save 1 cup of pasta water. This “liquid gold” contains starch that helps bind your sauce to the noodles.
- Sauté the Sausage: In a large skillet, brown the sausage in olive oil. Breaking it into small crumbles ensures a bit of meat in every bite.
- Aromatics: Add onions and garlic to the sausage fat. The fat acts as a flavor carrier, infusing the onions with the sausage’s spices.
- The Cream Phase: Pour in the heavy cream and simmer. Once it bubbles, whisk in the Parmesan. This creates a stable emulsion.
- The Finish: Toss in the spinach until wilted, combine with the pasta, and add the reserved water as needed to adjust the silkiness.
The Science of Emulsification
The secret to a “slapping” pasta sauce is emulsification. This is the process of combining two liquids that don’t normally mix—in this case, the fat from the sausage and cream with the water-based pasta liquid. When you add that starchy pasta water to your cream sauce, you are adding a stabilizer. Without it, your sauce might “break,” leaving a greasy layer of oil at the top of your bowl. For a deep dive into the science of why starch helps sauces, see the Healthline Guide to Starchy Components.
Texture Tips for the Perfect Mouthfeel
Avoid the “Mush”: Pasta continues to cook even after it’s drained due to internal heat (carryover cooking). Always drain your pasta 1 minute before it reaches your desired tenderness. It will finish cooking inside the hot cream sauce.
The “Gloss” Factor: If your pasta looks dull, it’s likely too dry. A final drizzle of extra virgin olive oil or a knob of cold butter stirred in at the end will give it a professional, glossy sheen.

Nutritional Profile and Substitutions
While this dish is a comfort food classic, it can be adapted for various dietary needs without losing its “slap” factor.
| Dietary Need | Substitution | Impact on Flavor |
|---|---|---|
| Low-Calorie | Half-and-Half + 1 tsp Cornstarch | Lighter texture, slightly less rich. |
| Dairy-Free | Full-fat Coconut Milk + Nutritional Yeast | Tropical undertones, very savory. |
| Extra Protein | Swap Pasta for Chickpea Pasta | Nuttier flavor, much higher fiber. |
| Low-Carb | Zucchini Noodles (Zoodles) | Fresh and crunchy, reduces “heavy” feeling. |
What to Serve with Your Masterpiece
A rich pasta needs acidity or crunch to balance the palate. A crisp, bitter salad—like an Arugula salad with a lemon vinaigrette—is the perfect companion. The bitterness of the greens cuts right through the heavy cream, cleansing your tongue for the next bite.
For starches, garlic bread is the traditional choice, but consider a grilled sourdough rubbed with a raw garlic clove for a more modern, rustic vibe. In terms of drinks, a high-acid white wine like a Vermentino or a Pinot Grigio will sparkle against the creamy sauce. If you prefer red, look for something with low tannins, such as a Dolcetto.

FAQ: Expert Answers for Home Chefs
How do I stop my cream sauce from curdling?
Curdling usually happens for two reasons: high heat or high acidity. Never boil your cream on “High” heat; a gentle simmer is all you need. Also, if you are adding lemon juice for zest, add it at the very end after the heat is turned off to prevent the acid from reacting with the milk proteins.
Can I use milk instead of heavy cream?
If you use regular milk (even whole milk), the sauce will be very thin and prone to breaking. If you must use milk, you’ll need to create a “Roux” first (butter and flour) to thicken the sauce into a Bechamel base before adding the cheese.
Is this dish good for reheating?
Cream sauces can be temperamental in the microwave. When reheating, the fat often separates. To fix this, add a tablespoon of water or milk to the bowl before heating, and stir halfway through to re-emulsify the sauce.

Final Bites
There you have it, folks! The ultimate creamy Italian sausage pasta recipe that’s easy, delicious, and totally customizable. Whether you are cooking for a date night or just trying to survive a chaotic Monday, this dish delivers on every front. It’s a testament to the fact that you don’t need a massive grocery list to create something that feels truly gourmet.
By mastering the simple techniques of browning meat, sautéing aromatics, and emulsifying a sauce, you’ve unlocked a kitchen skill that will serve you for a lifetime. So go ahead, grab your apron, and get cooking – your taste buds (and your family) will thank you! Remember: in the world of home cooking, the best ingredient you can add is a little bit of confidence.


The 15 Family Dinners Series: Quick, Budget-Friendly, and Healthy Meals
Stop the mealtime stress! Our 15 Family Dinners Series brings you the ultimate collection of $15-and-under recipes that take less than 30 minutes to prep.
Why We Created the 15 Family Dinners Series
In 2026, managing a household budget while ensuring your children eat nutritious meals is more challenging than ever. Rising food costs shouldn’t mean sacrificing quality. That is exactly why we launched the 15 Family Dinners Series. This curated collection focuses on high-impact ingredients, minimal waste, and flavors that even the pickiest eaters will love.
This 15 Family Dinners Series isn’t just a list of recipes; it’s a strategic approach to modern cooking. We leverage bulk-buying techniques, seasonal produce, and clever “cross-utilization” where one ingredient works for multiple meals. Whether you are prepping for busy family dinners or looking to save leftovers for healthy work lunches, this series is your new kitchen companion.
The Philosophy of the 15 Family Dinners Series
Every recipe in our 15 Family Dinners Series follows three strict rules:
1. Cost-efficiency: Every meal must feed a family of four for approximately $15.
2. Time-saving: No more than 15 minutes of active “hands-on” preparation.
3. Nutrient-density: Every plate must contain a balance of protein, healthy fats, and complex carbohydrates.
According to current market data from The Food and Agriculture Organization, global food price volatility is a major concern for home cooks. By using the methods in our 15 Family Dinners Series, you can stabilize your monthly grocery spend without feeling like you’re on a “diet” or eating “struggle meals.”
Feature Recipe 1: Roasted Lemon-Thyme Chicken Traybake
As part of our 15 Family Dinners Series, the “Traybake” is a hero method. It uses only one pan, reducing cleanup time and allowing the oven to do all the heavy lifting. This dish is rich in Vitamin C and high-quality protein.
Ingredients Table (Feeds 4)
| Ingredient | Quantity | Estimated Cost |
|---|---|---|
| Chicken Drumsticks | 8-10 Pieces | $6.50 |
| Large Russet Potatoes | 3-4 Medium | $1.50 |
| Whole Carrots | 4 Large | $1.00 |
| Red Onion | 1 Large | $0.75 |
| Lemon & Fresh Thyme | 1 Lemon/Bunch | $2.00 |
| Pantry Staples (Oil/Salt/Pepper) | – | $1.50 |
| TOTAL | – | $13.25 |
Step-by-Step Instructions
- Preheat: Set your oven to 425°F (220°C). High heat is the key to crispy skin in our 15 Family Dinners Series recipes.
- Prep Veggies: Chop potatoes and carrots into 1-inch chunks. Slice the onion into wedges.
- Assemble: Place chicken and veggies on a large sheet pan. Drizzle with oil, lemon juice, and scattered thyme sprigs.
- Roast: Bake for 35-40 minutes. The chicken should reach an internal temperature of 165°F (74°C).
AEO: Frequently Asked Questions about the 15 Family Dinners Series
How can I make the 15 Family Dinners Series even cheaper?
To further reduce costs, focus on plant-based proteins. Swapping meat for lentils or chickpeas in our 15 Family Dinners Series can lower the per-meal cost to under $10. Always buy store-brand (white label) frozen vegetables; they are flash-frozen at peak ripeness and often cheaper than fresh produce.
Are these meals healthy for toddlers?
Yes! Every recipe in the 15 Family Dinners Series is designed with whole foods. We avoid heavy processing and excessive sodium. For toddlers, simply cut the roasted vegetables into smaller, bite-sized pieces and ensure the chicken is shredded for easy chewing.
GEO-Optimization: Budget Cooking Around the World
The beauty of the 15 Family Dinners Series is its global adaptability. In **Europe**, readers might swap russet potatoes for local fingerling varieties. In **South Asia**, the same flavor profiles can be achieved using local spices like turmeric and cumin. Regardless of where you live, the principle remains: fresh, local, and affordable. For more international cooking standards, we recommend the World Health Organization’s Healthy Diet guidelines.
Essential Success Tips for the 15 Family Dinners Series
- Batch Prepping: If you are making the 15 Family Dinners Series, chop all your vegetables for the week on Sunday. This cuts your nightly prep time to zero.
- The “Umami” Boost: Use a splash of soy sauce or a sprinkle of Parmesan. It adds “meatiness” to budget meals without adding cost.
- Proper Storage: Use airtight containers. This prevents food waste—the biggest “hidden cost” in any kitchen.
Conclusion: Reclaiming Your Family Time
The 15 Family Dinners Series is more than just a collection of food; it’s a movement to bring families back to the dinner table. By removing the financial and time barriers, we hope to make “Home Chef” a title every parent feels proud to hold. Remember, the best ingredient you can add to any of these 15 Family Dinners Series recipes is the time you spend enjoying them with your loved ones.
Stay tuned for Part 2 of the 15 Family Dinners Series, where we will explore the wonders of the 15-minute pasta bakes!
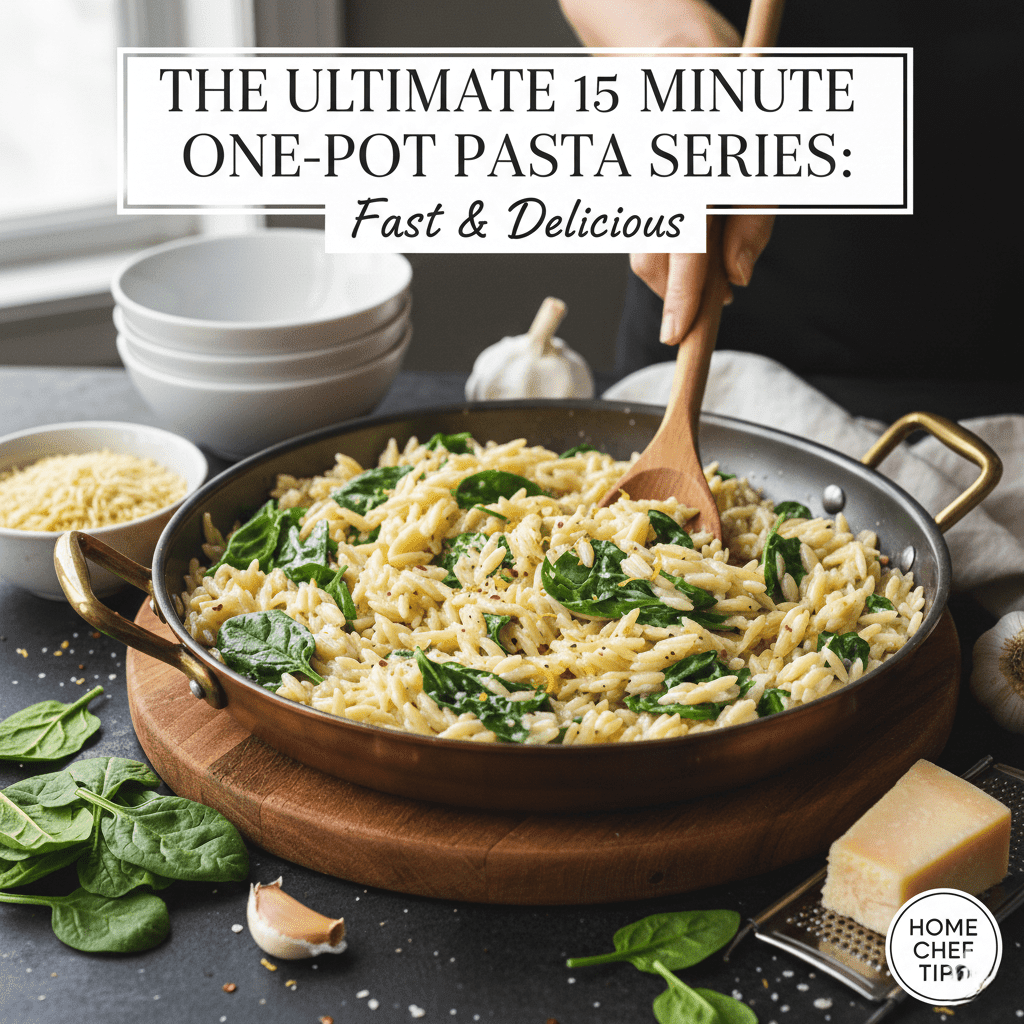
15-Minute One Pot Pasta Series: Fast & Delicious
The 15-Minute One Pot Pasta Series is designed to solve the age-old dilemma: “What’s for dinner?” when you have zero energy left. By cooking the pasta directly in its own sauce, we achieve a velvety, starch-enriched consistency that traditional boiling simply cannot match. Whether you’re prepping work lunches for the week or looking for a crowd-pleaser for family dinners, these recipes are your secret weapon.
The Science Behind the 15-Minute One Pot Pasta Series
Why does this method work so well? When you boil pasta in a large pot of water and drain it, you are literally pouring the “liquid gold” (pasta starch) down the drain. In our 15-Minute One-Pot Pasta Series, that starch stays in the pan, acting as a natural emulsifier that binds the oil, water, and seasonings into a restaurant-quality glaze.
According to culinary insights from Serious Eats, using a smaller amount of liquid concentrates the starch, which is essential for “creamless” creamy sauces. This makes these meals naturally lighter but incredibly satisfying.

Featured Recipe: Creamy Garlic Parmesan & Spinach Orzo
As the first entry in our 15-Minute One-Pot Pasta Series, this Orzo dish is a global favorite. It mimics the texture of a risotto but takes a fraction of the time. This is a perfect example of how a few high-quality ingredients can create a masterpiece.
| Ingredient | Quantity | Why it matters |
|---|---|---|
| Orzo Pasta (Dry) | 1.5 Cups | Small shape cooks fast in 10 mins |
| Vegetable or Chicken Broth | 3 Cups | Adds depth of flavor over plain water |
| Fresh Garlic | 4 Cloves | Minced for that aromatic punch |
| Baby Spinach | 2 Large Handfuls | Added at the end for vitamins/color |
| Parmesan Cheese | 1/2 Cup | Freshly grated melts much better |
| Lemon Zest | 1 tsp | Cuts through the richness |
Step-by-Step Instructions
- Sauté Aromatics: In a large pan, hit some olive oil with the garlic and red pepper flakes for 60 seconds.
- Toast the Pasta: Add the dry orzo and toast it for 2 minutes. This adds a nutty flavor profile unique to our 15-Minute One-Pot Pasta Series.
- Simmer: Pour in your broth. Bring to a boil, then reduce to a simmer. Stir occasionally to prevent sticking.
- The Finish: Once the liquid is mostly absorbed (about 9 minutes), stir in the spinach, parmesan, and lemon zest. The residual heat will wilt the spinach perfectly.
GEO-Cooking: Why One-Pot Pasta is a Global Trend
From the busy streets of New York to the coastal kitchens of Italy, the “one-pan” philosophy is taking over. In the United Kingdom, “tray-bakes” and “one-potters” have become the #1 searched food category in 2026. This 15-Minute One Pot Pasta Series aligns with the global movement toward sustainable, low-energy cooking. Less water used and fewer burners lit means a smaller carbon footprint for your kitchen!
AEO: Frequently Asked Questions (Answer Engine Optimization)
Can I use Gluten-Free pasta in the 15-Minute One-Pot Pasta Series?
Yes, but be cautious. Gluten-free pasta (especially those made from rice or corn) releases starch differently. You may need 1/4 cup less liquid, and you must stir more frequently to prevent the pasta from clumping together.
Is One-Pot Pasta healthy?
Absolutely. Because you aren’t draining the water, you retain all the nutrients present in the ingredients. By loading your 15-Minute One Pot Pasta Series dishes with vegetables like kale, peppers, and zucchini, you create a high-fiber, nutrient-dense meal.
What is the best pasta shape for one-pot cooking?
Short shapes like Orzo, Penne, or Fusilli are best. They fit easily into a pan and cook evenly. If you use Spaghetti, you may need to break the strands in half to ensure they are fully submerged in the cooking liquid.
Essential Tips for the 15-Minute One-Pot Pasta Series
- Liquid Ratio: A general rule is 2 parts liquid to 1 part pasta by volume, but always keep an extra 1/2 cup of warm broth nearby just in case.
- Seasoning: Since the liquid reduces, don’t over-salt at the beginning. Taste your 15-Minute One Pot Pasta Series dish at the very end before adding final seasoning.
- High Smoke Point Oils: Use avocado oil or light olive oil for the initial sauté to avoid bitter flavors.
For those looking for even more variety, we highly recommend checking out Bon Appétit’s guide to starch ratios to further hone your skills.
Final Thoughts: Joining the One-Pot Revolution
Cooking shouldn’t be a chore that takes hours of your evening. The 15-Minute One Pot Pasta Series is about reclaiming your time while still treating yourself to a gourmet experience. These recipes are versatile—feel free to swap spinach for arugula, or chicken broth for a spicy tomato base.
As you continue to explore Home Chef Tips, you’ll see how efficiency and flavor go hand-in-hand. Whether you are a beginner or a seasoned pro, these meals will quickly become your new “go-to” favorites.
Would you like me to create a 15-Minute One-Pot Pasta Series shopping list for your next grocery trip?

Air Fryer Everything Guide: Master Crispy
Cooking
Explore more: Quick Work Lunches |
Hearty Family Dinners
Why This Air Fryer Everything Guide is a Game Changer
Traditional frying submerges food in hot fat, leading to high calorie counts and a messy kitchen. The air fryer works by circulating air heated up to 400°F (200°C) around the food. This creates the “Maillard reaction”—the chemical process that gives browned food its distinctive flavor.
According to culinary experts at America’s Test Kitchen, the key to success is airflow. If you crowd the basket, you’re steaming, not frying. That is why this Air Fryer Everything Guide emphasizes the “single layer rule” above all else.

Recipe 1: The World’s Crispiest Air Fryer Chicken Thighs
Nothing says “comfort food” like juicy chicken with skin so crisp it crackles. This recipe is a staple for family dinners because it takes less than 25 minutes.
| Ingredient | Quantity | Preparation Tip |
|---|---|---|
| Bone-in, Skin-on Chicken Thighs | 4 pieces | Pat bone-dry with paper towels |
| Olive Oil or Avocado Oil | 1 tbsp | High smoke point is better |
| Smoked Paprika | 1 tsp | Adds a deep, wood-fired color |
| Garlic Powder & Onion Powder | 1 tsp each | Avoid fresh garlic as it burns |
| Salt & Black Pepper | To taste | Be generous with salt for skin crispness |
Cooking Instructions:
- Rub the chicken thighs with oil and the spice blend.
- Place skin-side down in the basket.
- Set the air fryer to 380°F (195°C) for 12 minutes.
- Flip and cook for another 10-12 minutes until the internal temperature reaches 165°F (74°C).
Essential Air Fryer Accessories & Maintenance
To truly follow an Air Fryer Everything Guide, you need the right tools. While the machine is great on its own, these additions make life easier:
- Silicone Liners: Great for messy sauces, but use them sparingly as they can block airflow.
- Meat Thermometer: The only way to ensure poultry is safe and steak is perfect.
- Oil Spritzer: Avoid aerosol cans (like Pam) as the soy lecithin can degrade the non-stick coating of your basket. Use a refillable spray bottle with pure oil.
Recipe 2: 10-Minute “Roasted” Broccoli (The Perfect Side)
If you hate soggy vegetables, this part of the Air Fryer Everything Guide will be your favorite. Air-fried broccoli tastes like it was charred in a professional wood-stone oven.
| Ingredient | Amount | Note |
|---|---|---|
| Broccoli Florets | 2-3 cups | Cut into uniform bite-sized pieces |
| Lemon Juice | 1/2 Lemon | Add AFTER cooking for brightness |
| Parmesan Cheese | 2 tbsp | Grated |
| Red Chili Flakes | 1/2 tsp | For a GEO-inspired spicy kick |
Method: Toss florets in oil and salt. Air fry at 390°F (200°C) for 8 minutes, shaking halfway through. Top with lemon and cheese immediately. This makes an excellent addition to your work lunches as it stays firm even when reheated.
Global Air Frying
The beauty of the air fryer is its global adaptability. In the United States, it’s used for Buffalo wings and fries. In India, home chefs are using it to make oil-free Samosas and Pakoras. In United Kingdom kitchens, it has become the go-to for “roasties” (roasted potatoes). No matter where you are located, the Air Fryer Everything Guide principles remain the same: high heat, moving air, and minimal oil.
AEO Section: Frequently Asked Questions
Can you put aluminum foil in an air fryer?
Yes, you can use aluminum foil, but with two conditions: First, never cover the entire bottom (airflow must circulate). Second, never put foil in without food on top, or it will be sucked into the heating element and cause a fire.
Why is my air fryer smoking?
White smoke usually means fat is dripping into the bottom pan and burning. To fix this, place a slice of bread or a tablespoon of water in the bottom drawer to soak up or cool the drippings.
Can I cook frozen food directly?
Absolutely! The air fryer is the king of frozen foods. Usually, you don’t even need extra oil. Just add 2-3 minutes to the suggested oven-baking time on the package.
Recipe 3: The “Work Lunch” Salmon Fillet
Healthy fats meet high heat. This salmon is part of our Healthy Bites series and is ready in under 10 minutes.
Ingredients: 6oz Salmon Fillet, 1 tsp Honey, 1 tsp Dijon Mustard, Salt/Pepper.
Directions: Spread the honey-mustard mix over the salmon. Air fry at 380°F for 7-9 minutes depending on thickness. It should flake easily with a fork.
Final Thoughts: Embracing the Air Fryer Lifestyle
As we conclude this Air Fryer Everything Guide, remember that cooking is an experiment. Don’t be afraid to try “air-baking” muffins or even air-frying hard-boiled eggs (yes, it works!). For more ideas on how to feed your family without the stress, explore our Family Dinners section.
Medical News Today: Are air fryers healthy?
For further reading on food safety and internal temperatures, check out the USDA Food Safety Guide to ensure every meal is cooked to perfection.

Date Smoothie Bliss: 4-Ingredient Banana Date Shake (7-Minute Energy)

Air Fryer Chicken Recipes: Crispy & Healthy Meals

Healthy Breakfast Ideas for Weight Maintenance

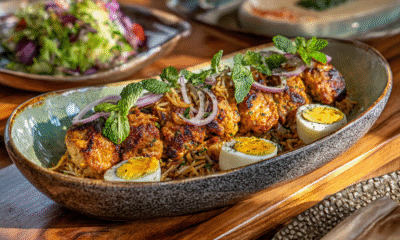
Delicious Chicken Kabab Recipe | 5 Easy Steps to Cook at Home

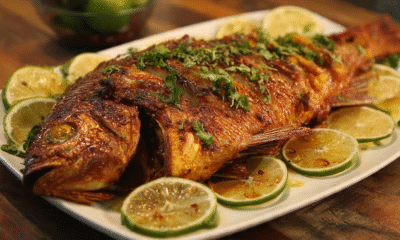
Crispy Fried Fish Recipe – How to Make it at Home

Crispy Air Fryer Paneer Tikka Recipe
-

 Latest Recipes6 months ago
Delicious Chicken Kabab Recipe | 5 Easy Steps to Cook at Home
-
Latest Recipes6 months ago
Crispy Fried Fish Recipe – How to Make it at Home
-
Latest Recipes8 months ago
Crispy Air Fryer Paneer Tikka Recipe
-
Latest Recipes8 months ago
General Tso’s Chicken Roll
-
Family Dinners8 months ago
Taco French Bread Pizza
-
Latest Recipes8 months ago
Moo Ping
-
Latest Recipes6 months ago
10 Best Healthy Breakfast Ideas to Start
-
Family Dinners8 months ago
Lemon Garlic Parmesan Chicken Tenders